DIY Troubleshooting Library
How to Batch Fix with S4S
There are two rules we would like you to be aware of before joining:
1. No pirated game support
We offer support for current, legal game versions only. Outdated game versions, pirated games or packs, DLC unlockers, etc. are not supported for various reasons.
2. No support if you are using mods depicting rape, bestiality, or pedophilia
Please be aware that if those files are found in your error report, we reserve the right to ban you instantly and without warning depending on the severity.
The rest of the rules are available here or in the Rules Channel (#scroll-of-summoning) after joining the Discord Server.
Still wanna join?
Sometimes Object CC breaks with game updates. Fortunately, for a lot of Object CC, there is a program which can fix the problems. This is a free program. So first, you’ll want to download it!
https://sims4studio.com/board/6/download-sims-studio-open-version
Remember: this is a program, not a mod, so don’t install it in your The Sims 4 folder. There are a few differences between the Windows version (which I use) and the Mac version, but hopefully there are enough similarities for this to still be useful.
Some main uses for the program:
- Seeing what CC looks like on a Sim
- Deleting CC you no longer want
- Removing swatches from CC
- Changing the tags of CC
- Batch Fixing CC
- Creating Mods and CC
This particular guide will cover Batch Fixing Broken Object CC.
Step 1: Open Sims 4 Studio
The first time you open Sims 4 Studio, and after a game update, the program will Index your game files. This is nothing to worry about, but it can take a little while to do. It won’t do it every time, though. Once it’s done, you should see a screen more or less like this:
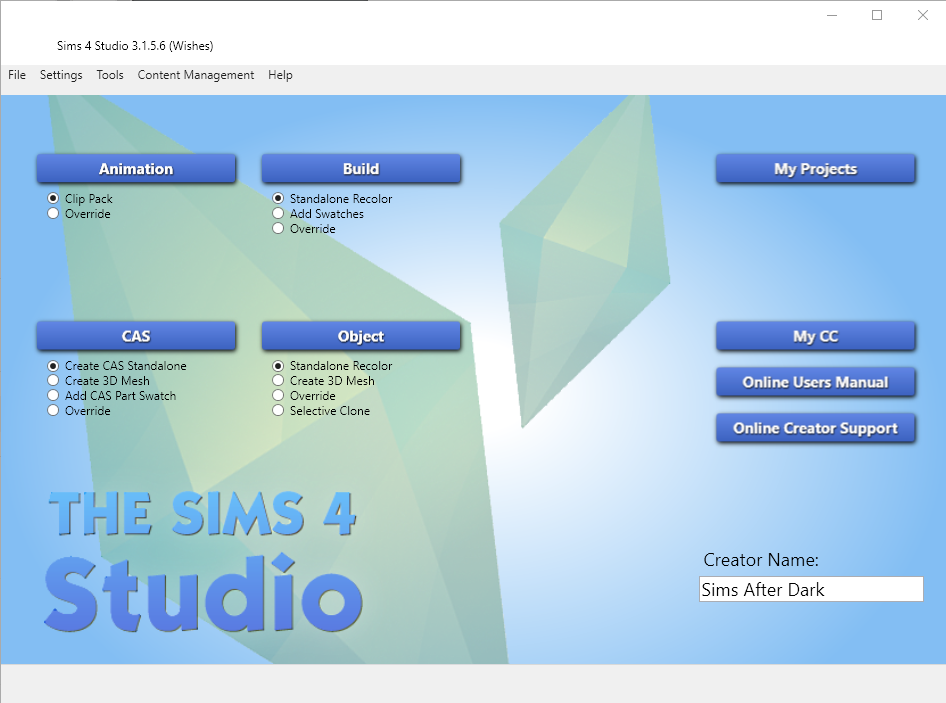
You can put your name in the Creator Name field if you like, but everything should work without doing so.
Next, you should make sure that the program has found your Mods location without issue. If you have everything as a default set-up this should be fine. If you’ve moved your Documents folder to another location, you might need to set that up.
Click Settings at the top, and it opens up a box like this:
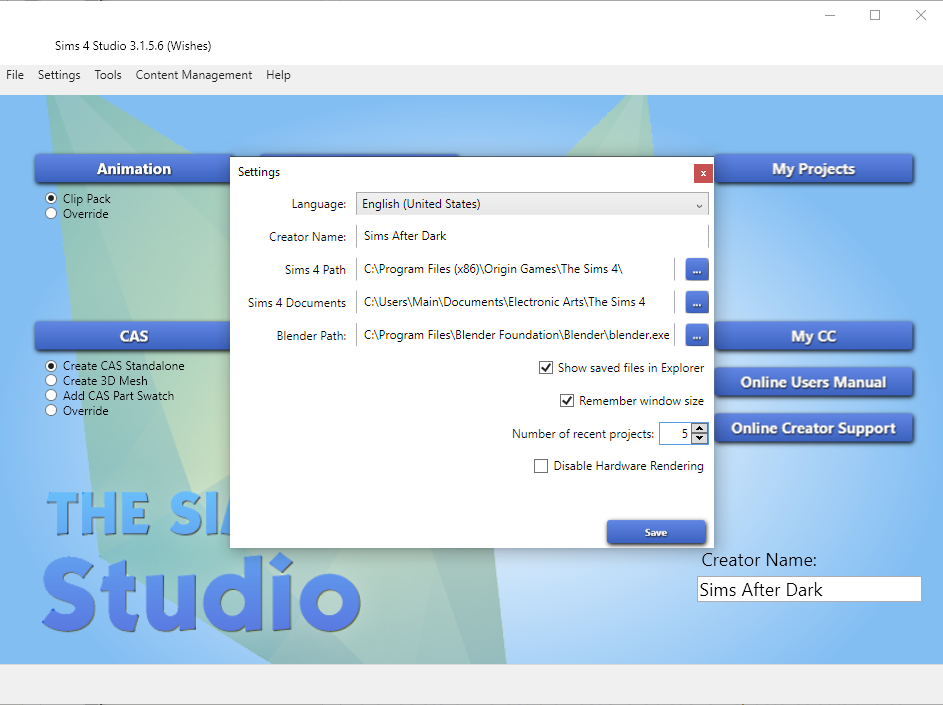
From there, you can select the correct Documents paths. Don’t worry if you don’t have Blender – that’s only used for editing CC meshes, which we’re not doing right now.
Step 2: Preparing to Batch Fix
Before you start running a Batch Fix, there are some things you need to remove from your folder. Default Replacement CC is the first and most important thing to remove, because Batch Fixes can break them.
Here’s an example of what happens if you Batch Fix Default Replacement CC:

It’s also important to remove Mods from your folder, as running a Batch Fix on them can cause problems.
Note: It’s recommended to make a copy of your Mods folder before running any Batch Fixes, so that in the unlikely event that something goes wrong, you have a backup.
But what if…
… my Mods folder is a mess?
So, sometimes you’ve been downloading things and just throwing them into your Mods folder. Or maybe, you didn’t know you were allowed to use sub-folders in your Mods folder. Either way, sometimes Mods folders can become a bit messy and unmanageable. We don’t want you to accidentally mess up your files by doing a Batch Fix on the wrong things, so, please refer to Part Six of the DIY Troubleshooting Guides: “How to Organize your Mods Folder”.
… I only want to Batch Fix one sub-folder?
If your CC is already well maintained, you may have all of the CC in ready-to-go folders. In that case, when you get to Step Four, you can choose the sub-folder rather than running the Batch Fix on your entire Mods folder.
Step 3: Choosing The Batch Fix
After your folder is prepared, you’re ready to go ahead and fix the objects. If you’ve shared a Last Exception file over at Sims After Dark’s Discord Server, it’s likely we’ve told you which one you need to run. If not, it’s actually safe to run all of the Batch Fixes in the Objects category of Sims 4 Studio.
To choose the Batch Fix, first you need to click on Content Management. Then move down to Batch Fixes, and over to Objects. You’ll see something like this:
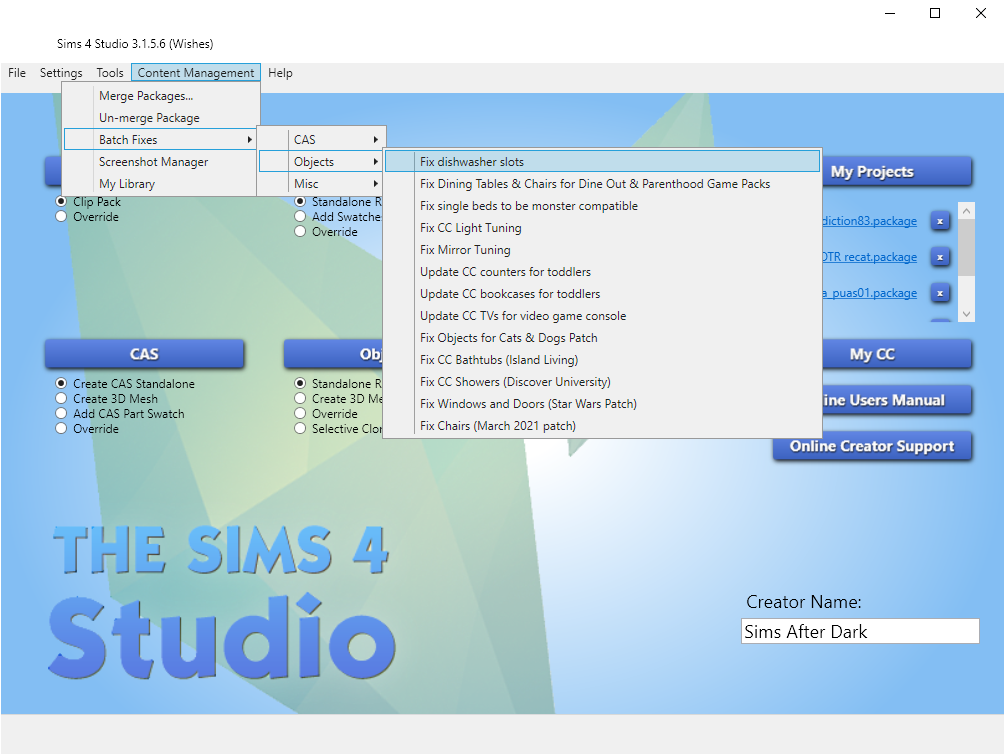
Click on the Batch Fix you want to run, and a box like this will pop up:
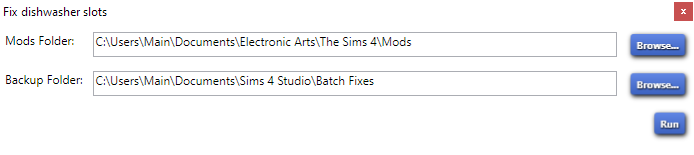
Step 4: Running the Batch Fix
By default, Sims 4 Studio will run the Batch Fix on your entire Mods folder. For most cases, that is what we want to happen.
If you have isolated the broken Object CC into one particular sub-folder, though, you can click Browse and then navigate to the folder you wish to run the Batch Fix on:
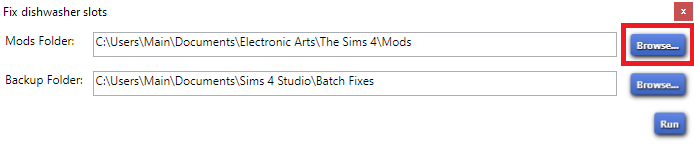
When you have the correct folder chosen, make sure the game is closed and click Run to begin the Batch Fix.
If you have a lot of CC, this step can take a while. Just let it do its thing.
Step 5: The Results
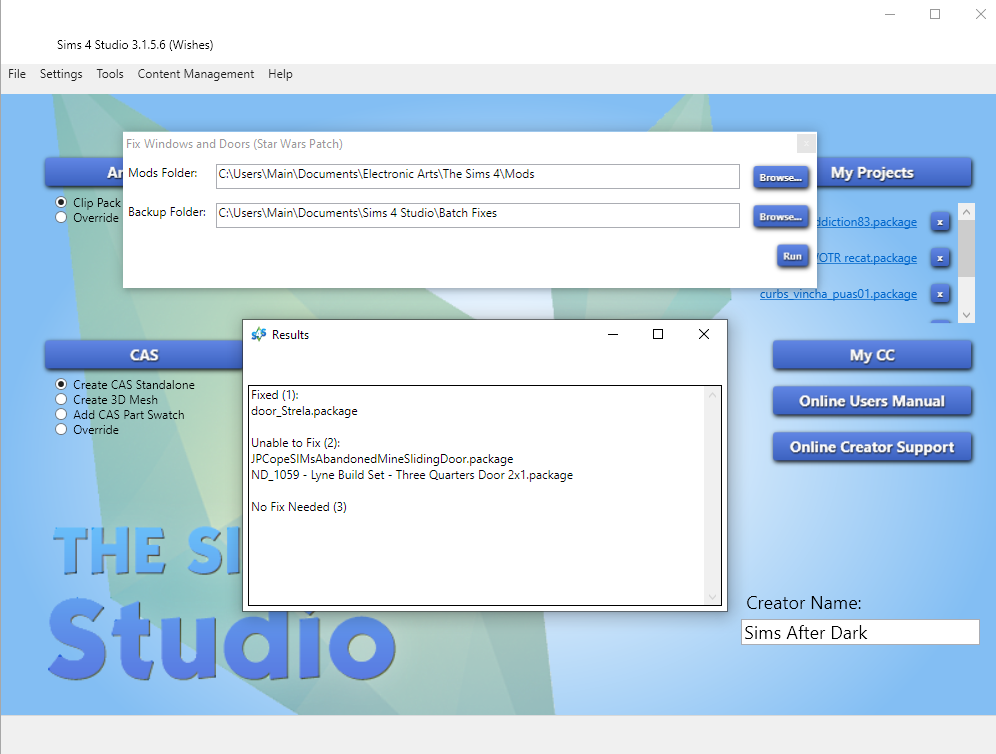
When the Batch Fix is finished, a Results box will appear. There can be three Results:
- If there is an Unable to Fix result, the Object CC must be deleted unless the Creator has updated it themselves. Fortunately, the Results box tells you the exact location of the file.
- If there is a Fixed result, that’s great! The file in your Mods folder is now fixed.
- If there is a No Fix Needed result, that’s great too – it means those files were not broken in this way.
In this example, I got each of the Results. In this case, two of my Object CC files must be deleted, one was successfully fixed, and the others were already okay.
But what if…
… it says No Fix Needed for all files?
If your CC says that No Fix is Needed, it’s possible that a different Batch Fix is required instead. We can help you find out which Batch Fix is needed over on the Sims After Dark’s Discord Server. It is however perfectly fine to run all of the Batch Fixes in the Objects category of Sims 4 Studio.
… I ran a Batch Fix on something by mistake?
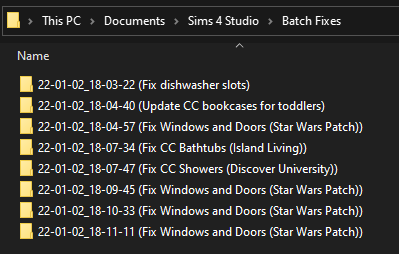
If for some reason you need to get back the original, unfixed copy of a CC file, it may be possible to find a backup of it.
The default location for these backups is This PC > Documents > Sims 4 Studio > Batch Fixes.
Here, you will find folders with dates and names of Batch Fixes that have been ran. Inside those folders are the original copies of the CC. Note that it’s not always possible to recover CC in this way. I also recommend deleting these backups periodically, as they can take up quite a lot of computer storage space.