How to use S4TI
There are two rules we would like you to be aware of before joining:
1. No pirated game support
We offer support for current, legal game versions only. Outdated game versions, pirated games or packs, DLC unlockers, etc. are not supported for various reasons.
2. No support if you are using mods depicting rape, bestiality, or pedophilia
Please be aware that if those files are found in your error report, we reserve the right to ban you instantly and without warning depending on the severity.
The rest of the rules are available here or in the Rules Channel (#scroll-of-summoning) after joining the Discord Server.
Still wanna join?
Sims 4 Tray Importer: The Basics
by moxhollow
First, you’ll want to download it!
This is a program, not a mod, so don’t install it in your The Sims 4 folder.
There are a few differences between the Windows version (which I use) and the Mac version, but hopefully there are enough similarities for this to still be useful.
For a guide on how to open Tray Importer on a Mac by meg, click here.
Some main uses for the program:
- Seeing what CC is used on a Sim
- Helping narrow down which CC is corrupt
- Zipping Sims up to share them with friends
- Quickly deleting Sims from your Library
- Getting the Household images for your Sim
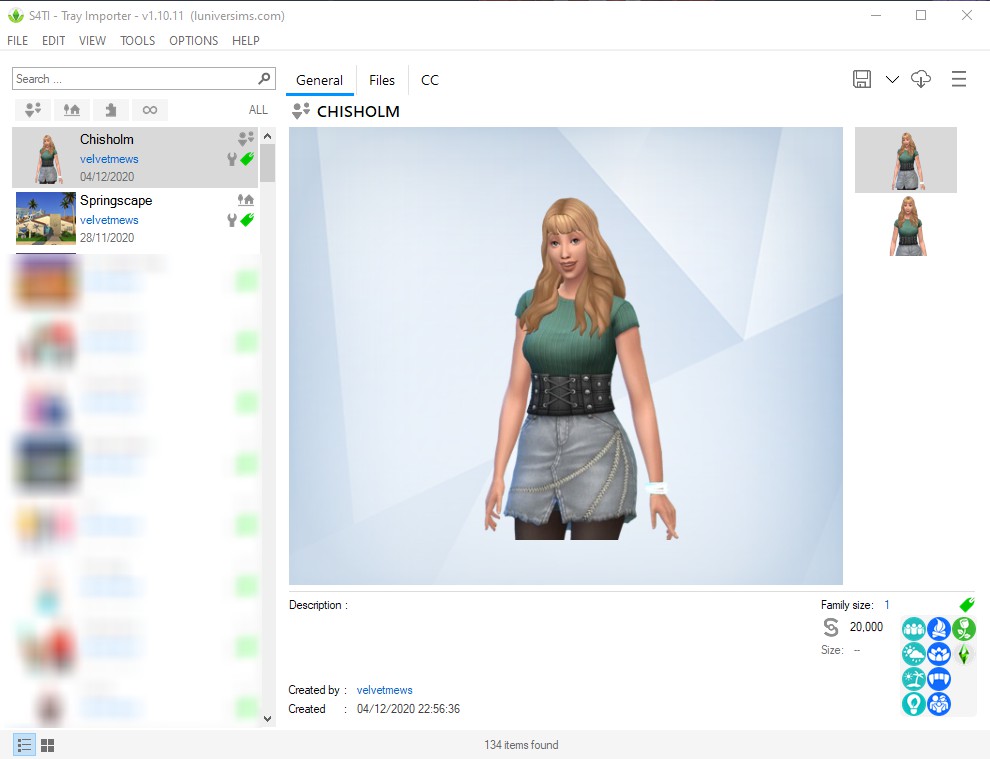
After you’ve got the program set up, you’ll see all of your Tray items on the left – these are Sims and Lots saved to your Library in the game. Immediately from here, you can see when a Sim was created, their funds, Packs used to create them, and some images.
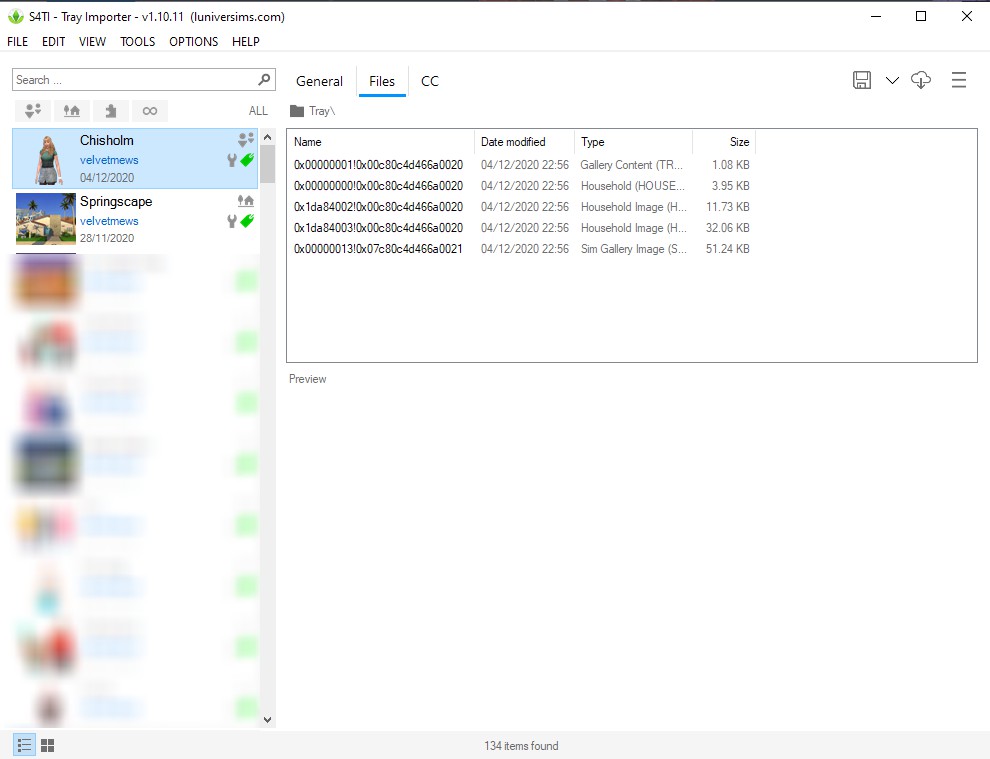
If you click on to the next tab, “Files”, you’ll see the weirdly-named Tray files which you would see in your Tray folder.
This is useful for when Tray files get corrupt, something which is somewhat rare but does unfortunately happen. So back them up from time to time! Here’s what the error files for that kind of thing look like:
So while yes, you’d still need to delete the problem item, at least you’d be able to look through and see which Family or Lot you’re having to delete.
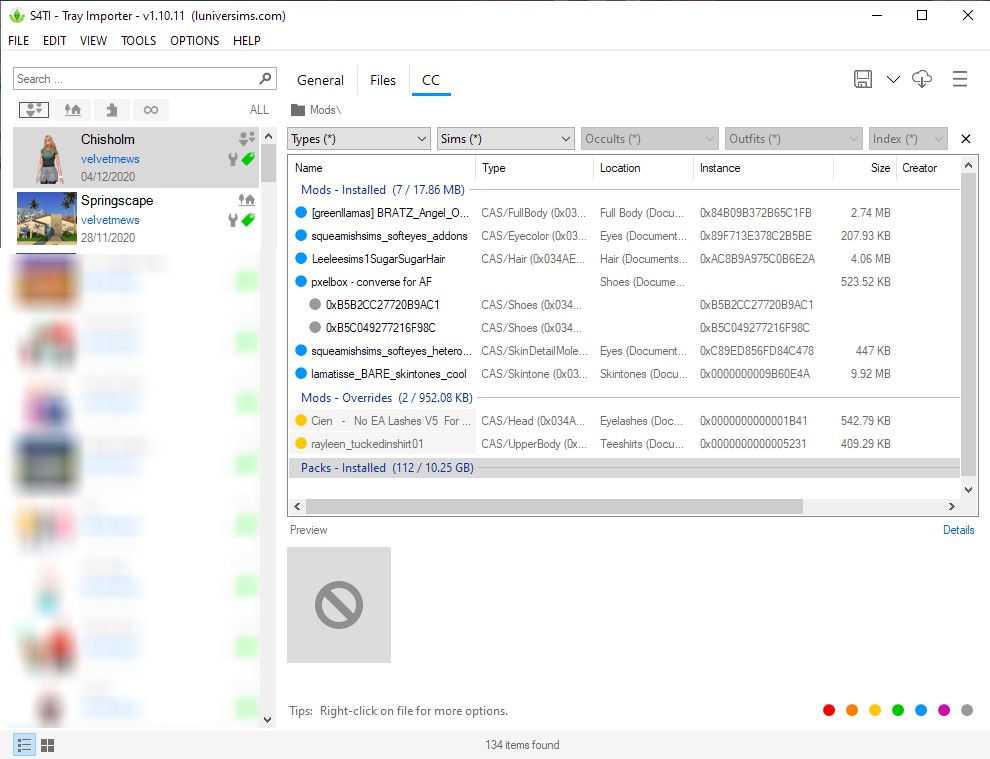
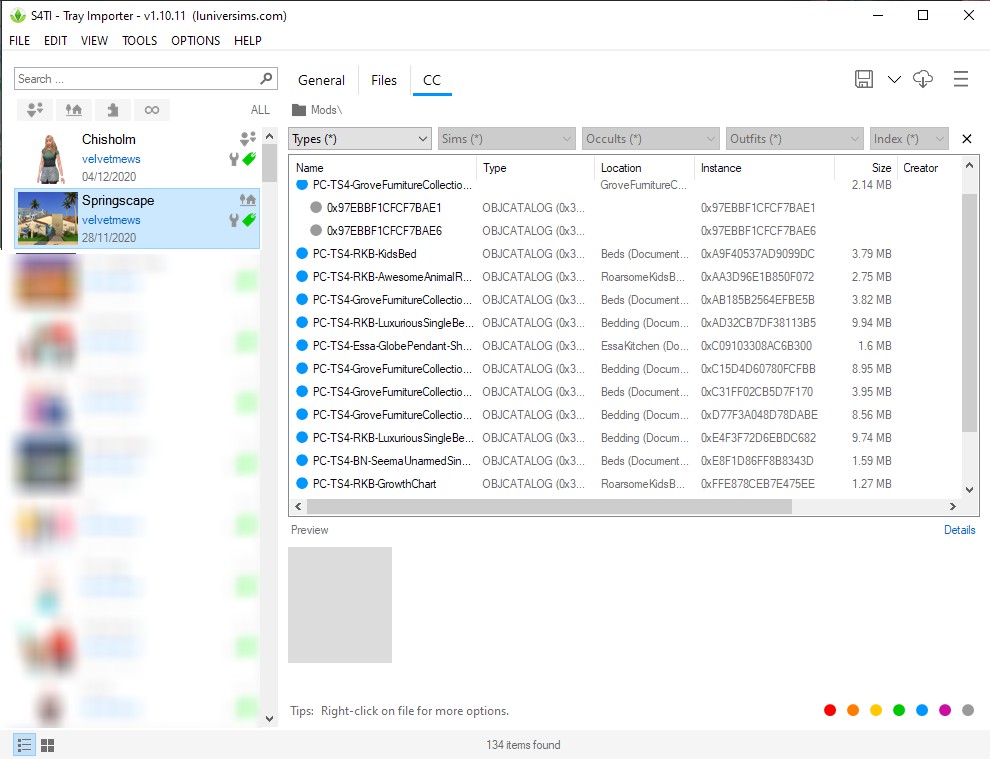
On the next tab, you’ll find the list of CC the Sim is using. So, if you have a Sim with checkmarks or other weird glitches, save them to your library from CAS. Then, open up Tray Importer, and you’ll be able to see a list of what they have on. This vastly helps narrow down files, especially if you have a lot of CC!
Some basic information is given: what the CC file is named, where it is in your folder, and which CAS part slot it fills. Things in the Overrides sections are typically default replacements, but this is not always the case. If you want to “jump” right to a specific file in your Mods folder – for example, when you think you’ve found the corrupt item, or if you just want to delete a piece you don’t use anymore – you can right click on it and choose “Show containing folder”.
This will take you to exactly where it is inside your Mods folder.
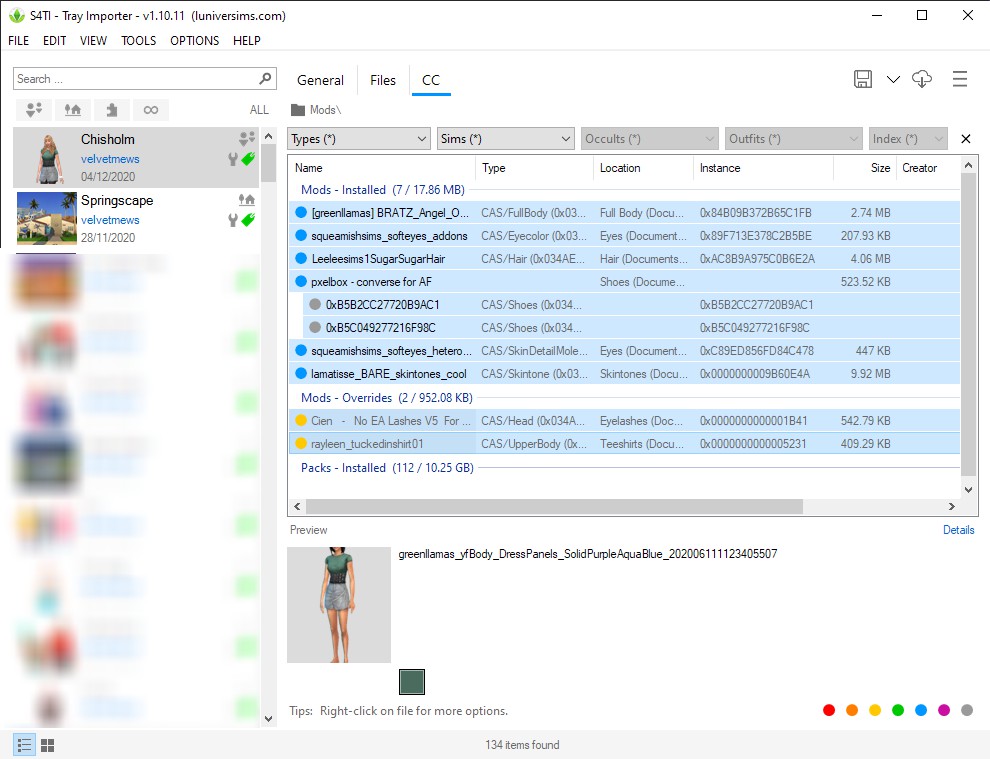
If you aren’t sure which piece of CC on the Sim is causing the issues, there’s a quick-ish way to test those items alone. First, highlight all of the items in the program.
Then on the top right, click the three lines and choose “Copy CC to”.
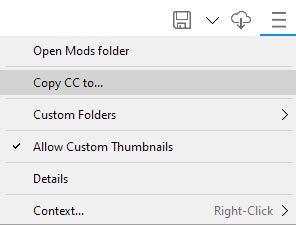
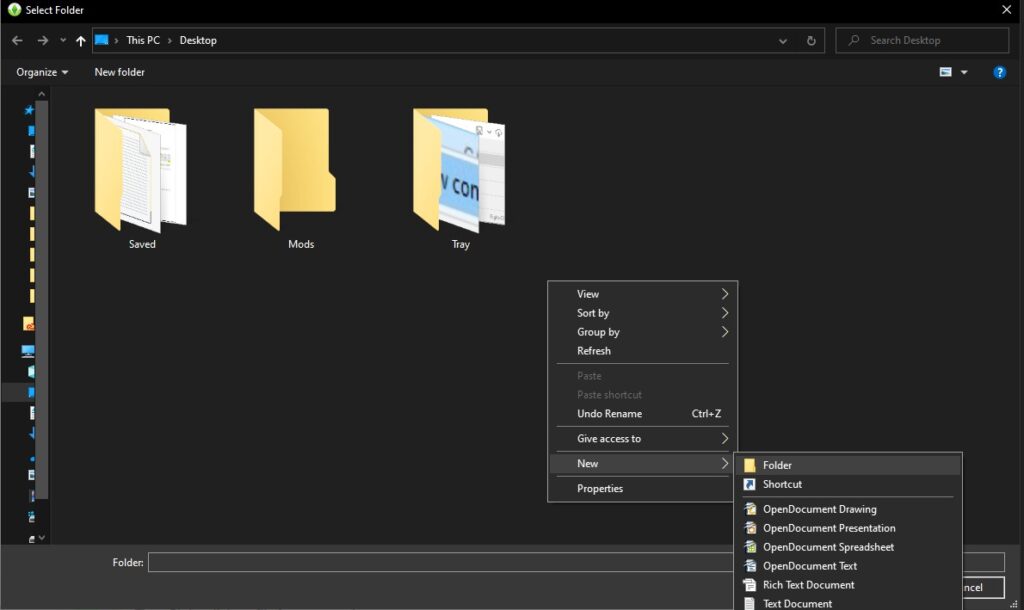
The program will let you choose where to copy the CC to, and then do so. I recommend creating a new folder to put it inside, as it named the folder Mods and so will merge with any other folders named Mods.
For your next step, you’ll want to move your Mods folder out of your The Sims 4 folder. Put it somewhere safe.
Then, find where you put the Copied CC, and move that Mods folder into your The Sims 4 folder.
Then when you launch the game, you’ll have only those CC items in, and will be able to narrow them down one at a time much more easily.
When you’re done, you can delete the Copied CC and put your main Mods folder back where it belongs! Just don’t forget to delete whichever the corrupt CC was from your main Mods folder, too.
On that top-right menu, there are a few other choices.
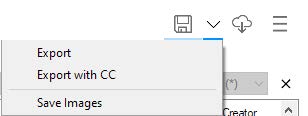
I personally use “Save Images” to get the cute Sims renders you see when selecting a household. You can also choose “Export”, and this will put your Sim in a .zip file. This is a nice, easy way to send a Sim to a friend, without having to upload them to the Gallery where anybody can see them.
However, you can also see there is the option to “Export with CC”. As tempting as I know this is, I do recommend not using it. While it can be a pain for people to track down CC themselves, it is against most Creators’ Terms of Use to share their files, and I think it’s much better to be respectful.
Instead, there’s a way to get a list of the CC to send to your friend, without having to type it all out:
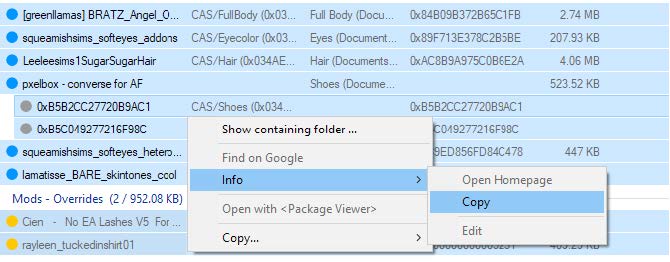
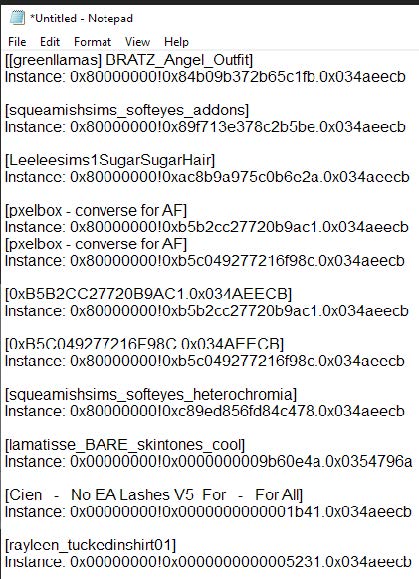
With all of the CC highlighted, right click, and navigate to Info and then Copy. Then, open Notepad or a similar word processing program, and Paste. Sure, the file could do with some tidying up, but it beats typing it all out!
If you’re more of a builder, you’ll be pleased to know this program works for Lots too!
It’s all exactly the same process as before, only this time with buildings.
I also mentioned at the beginning that it’s faster to delete unwanted Sims using the Tray Importer than the game. That’s because you can simply right click and delete any you no longer want; useful for when you have lots of duplicates!
